Configure the IntelliJ IDEA IDE
For Java development, in order to reduce development difficulty and improve development efficiency, developers should first select and configure a Java integrated development environment, such as IntelliJ IDEA, NetBeans or Eclipse, etc. This article will take InteliJ IDEA as an example to introduce how to configure java-orgon integration development environment.
This article describes the configuration of the java-orgon integrated development environment in InteliJ IDEA. java-orgon nodes support to be deployed on Linux or MacOS operating systems, and rely on Oracle JDK 1.8, other versions of JDK are not supported. Before configuring the InteliJ IDE development environment, please ensure the following prerequisites:
- Configure the development environment on
LinuxorMacOSoperating system Oracle JDK 1.8,git, InteliJ IDEA are installed
Configure InteliJ IDEA
The IntelliJ IDEA configuration steps are as follows:
-
Install Lombok plugin
Search for
lombokin [IDEA]->[Preferences]->[Plugins] to installLombokplugin,Lombokmakes java-orgon code more concise by adding annotations. -
Enable
Enable annotation processingconfiguration item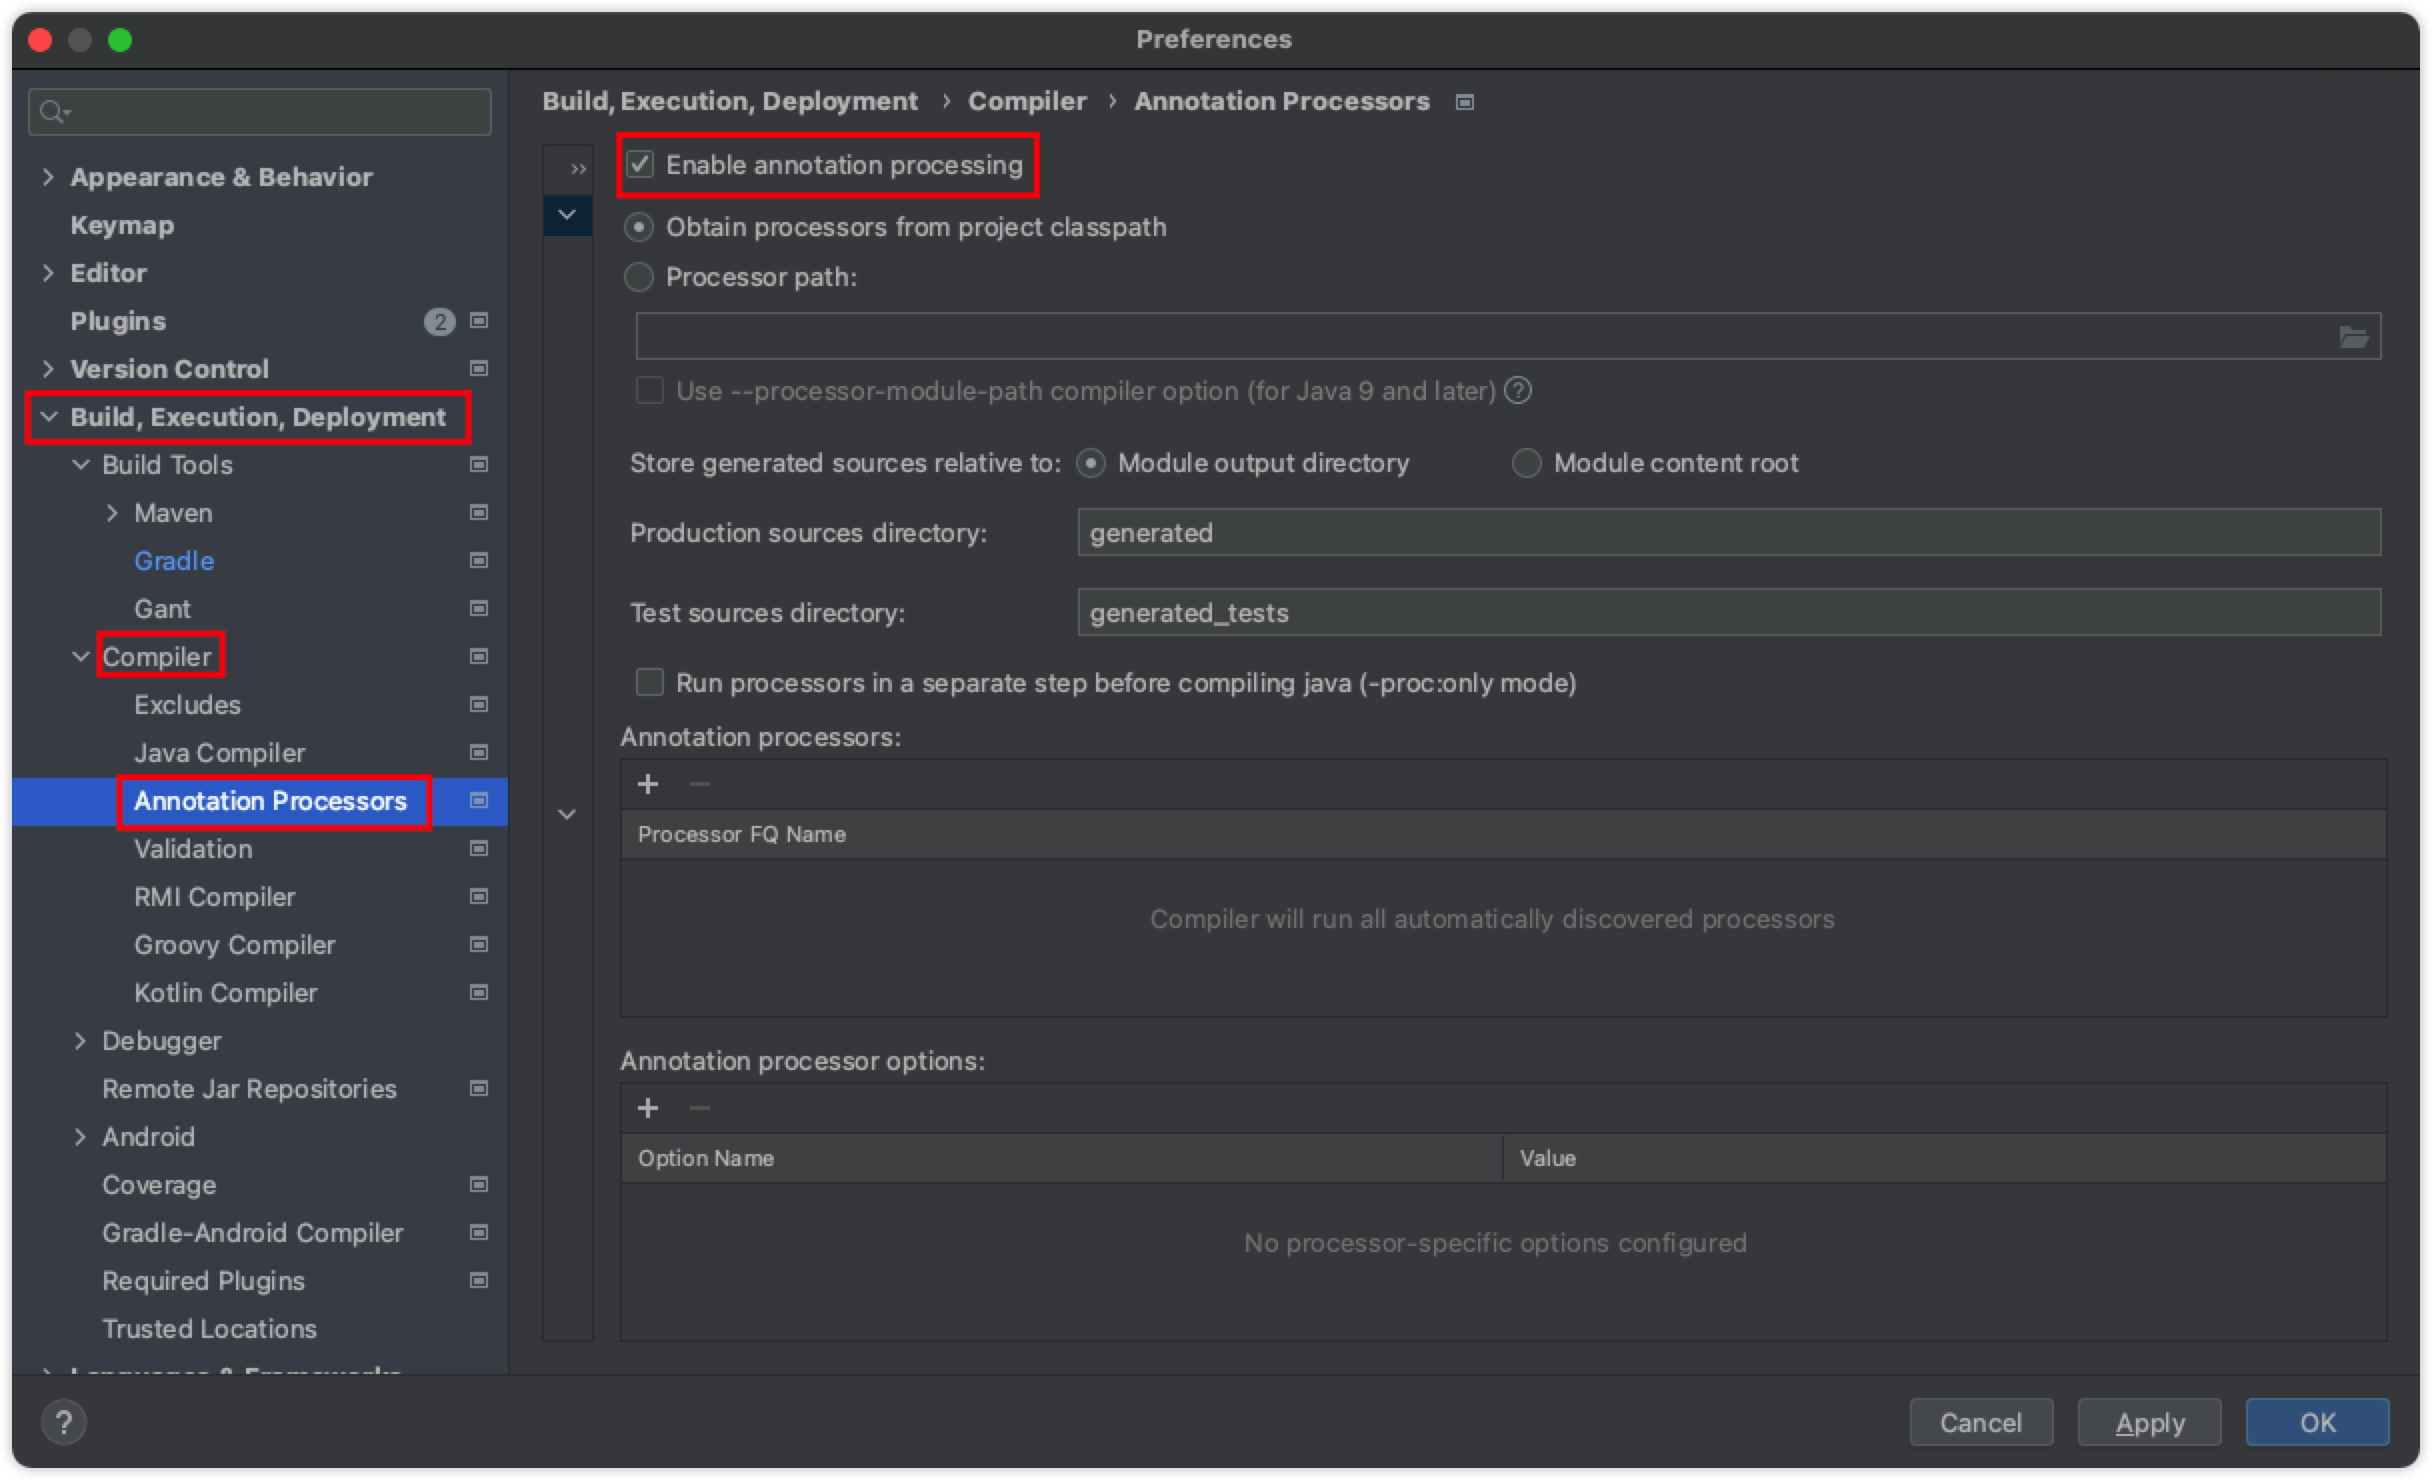
-
Check the JDK version and make sure that
Oracle JDK 1.8is used in IntelliJ IDEA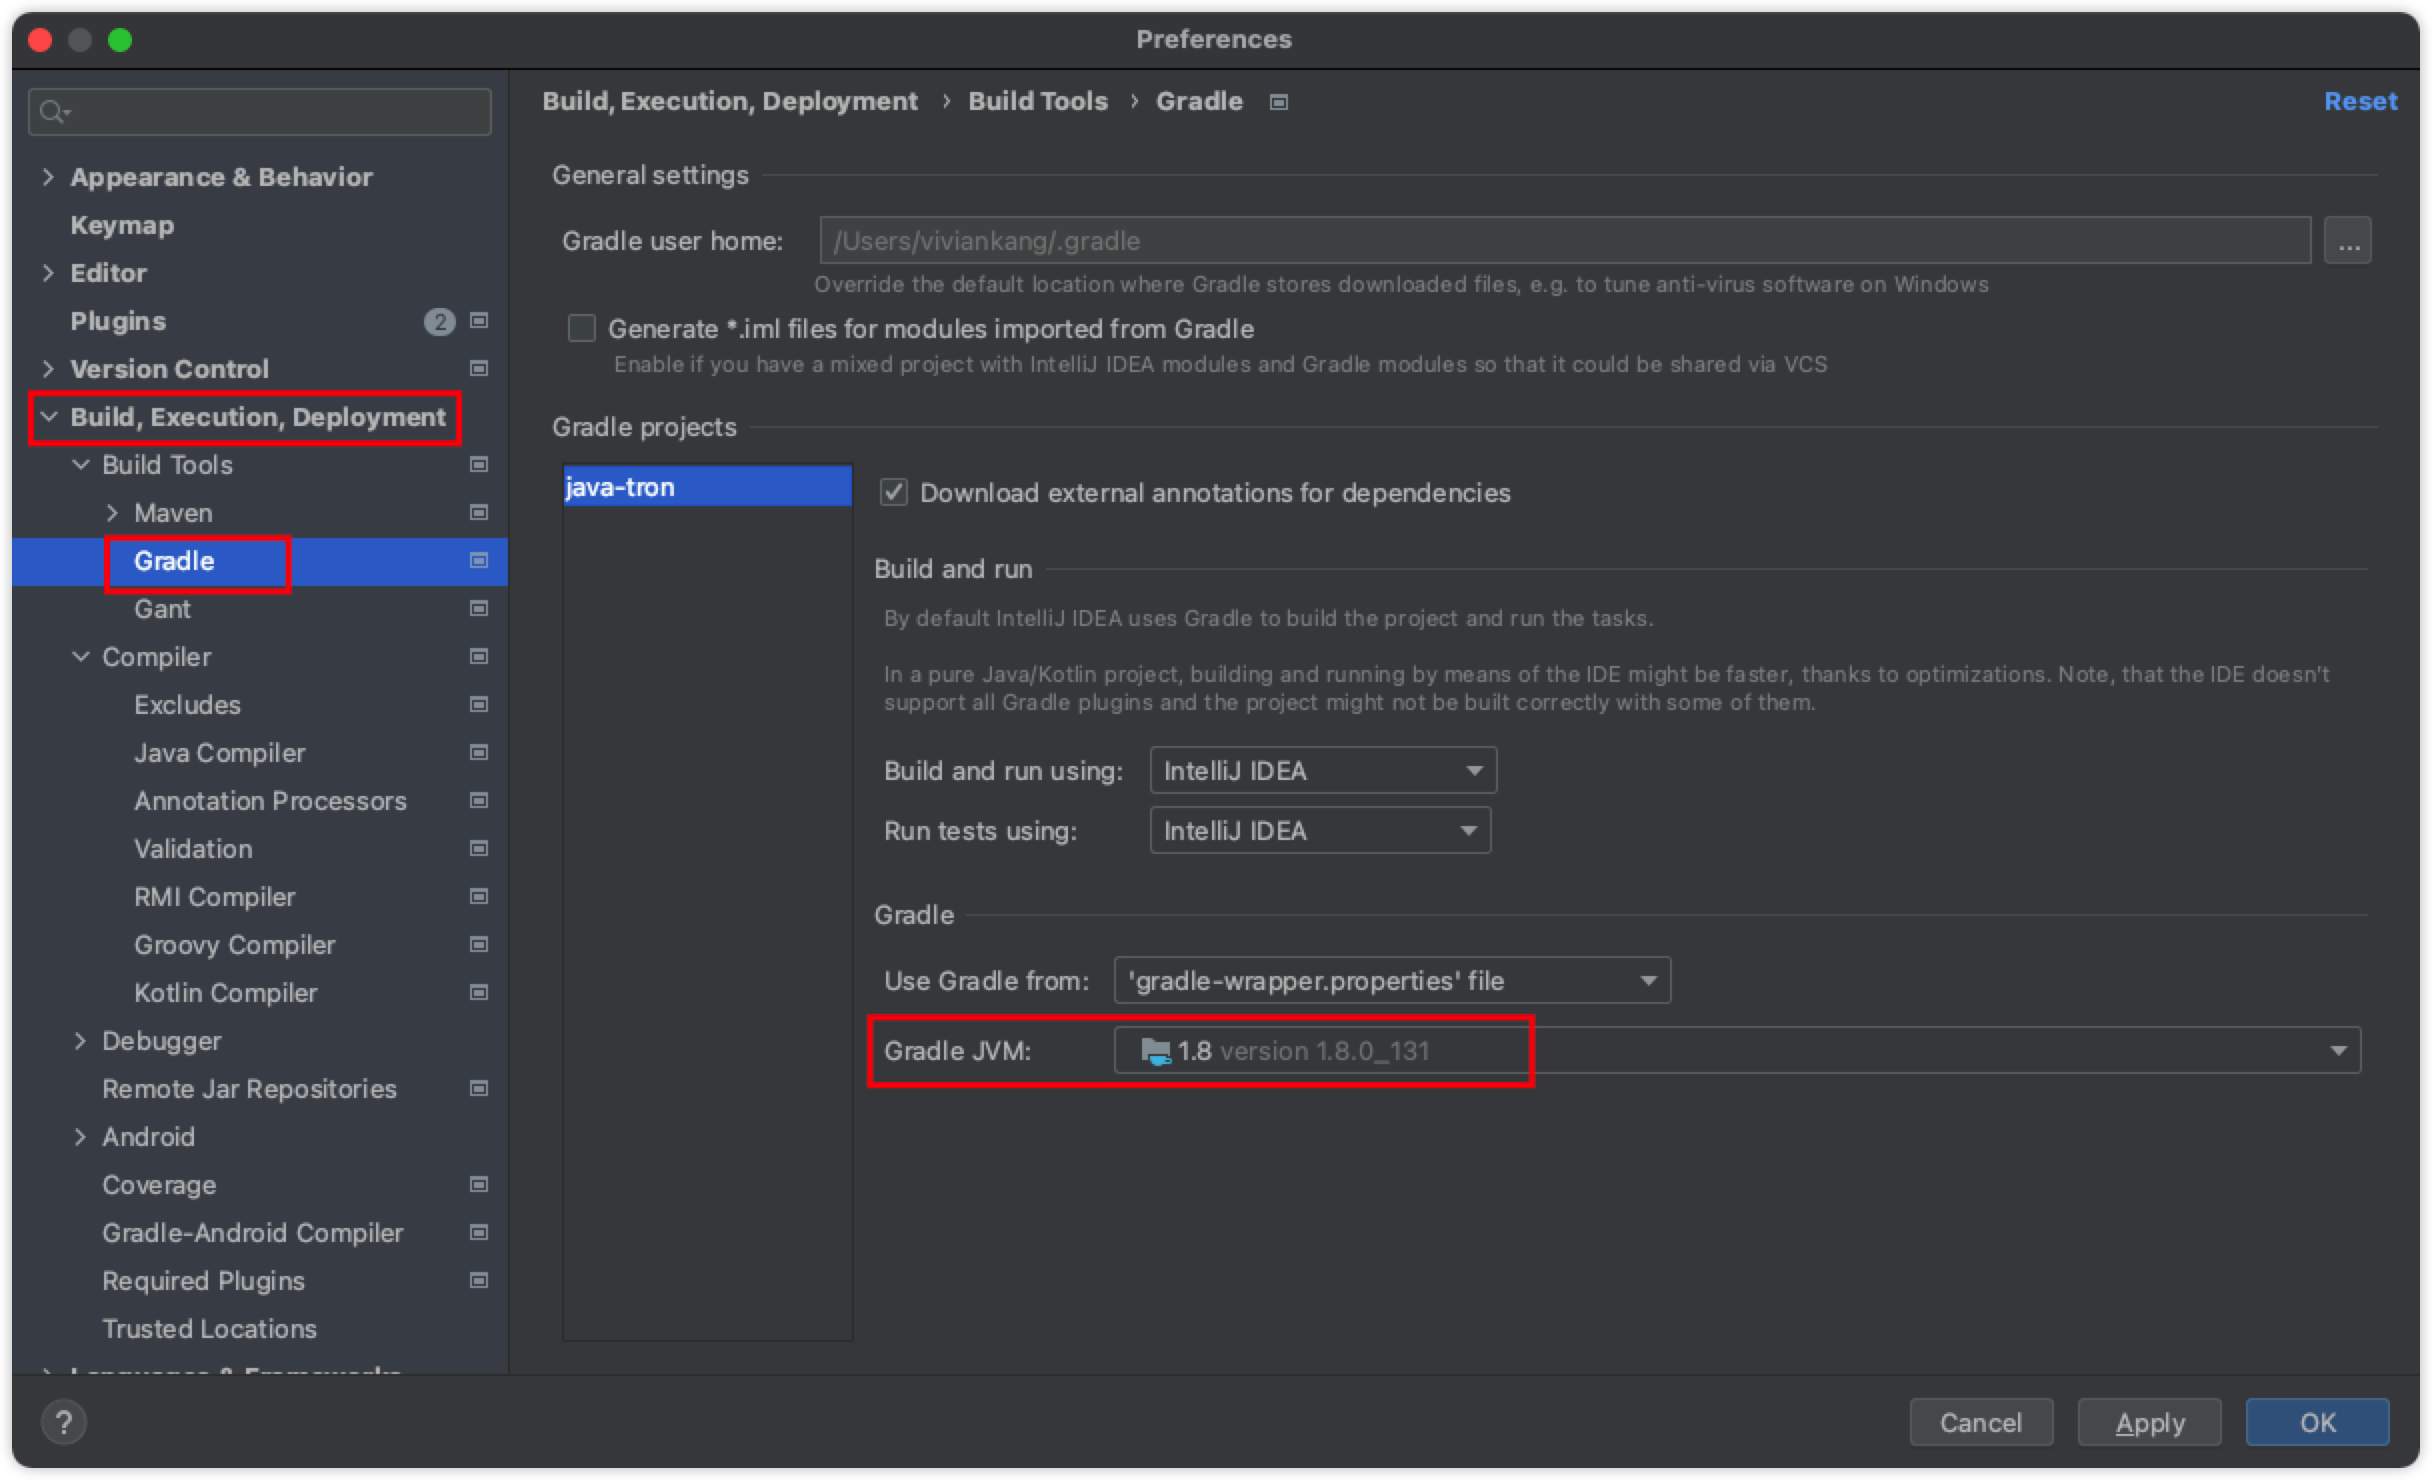
-
Download java-orgon source code
Clone the java-orgon source code locally and switch to the
developbranch.$ git clone https://github.com/alexozerov/java-orgon.git $ git checkout -t origin/develop
Configure the code style check plugin
The java-orgon code style needs to meet the Google check style specification. In IDEA, you can use the Checkstyle plugin to check whether the code conforms to the Google check style specification. The installation and configuration process of the plugin is as follows:
-
Search for
checkstylein [IDEA]->[Preferences]->[Plugins] to install the plugin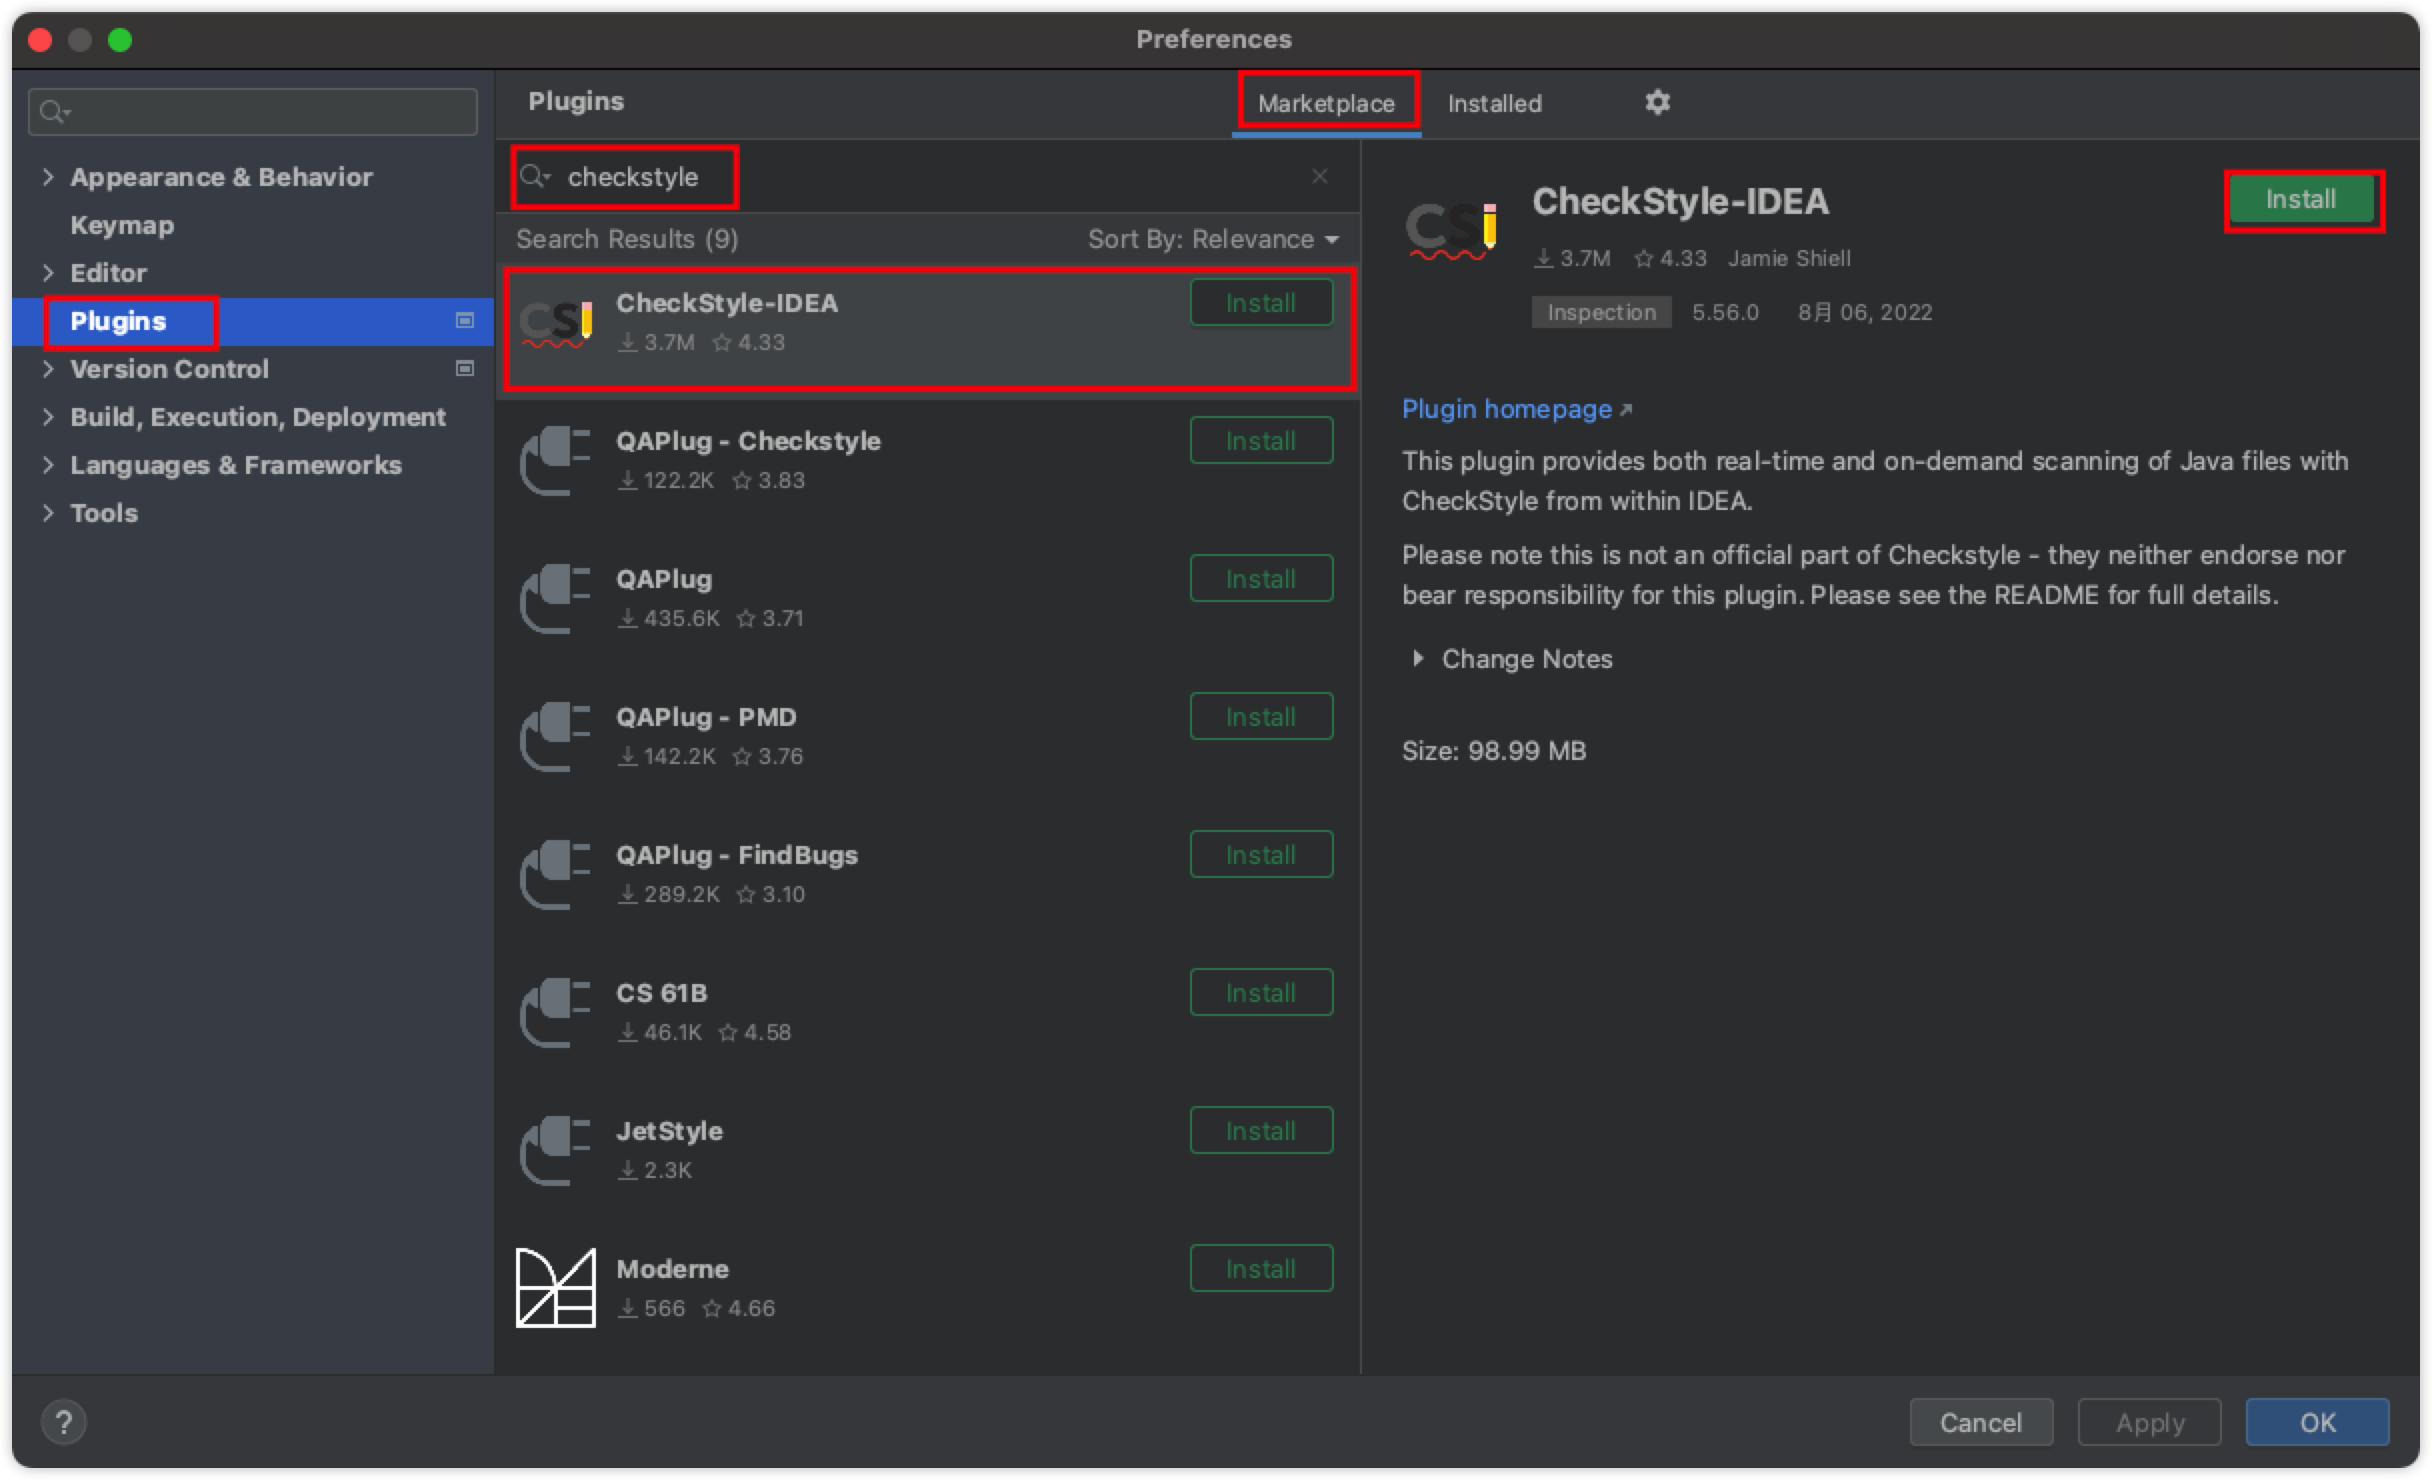
-
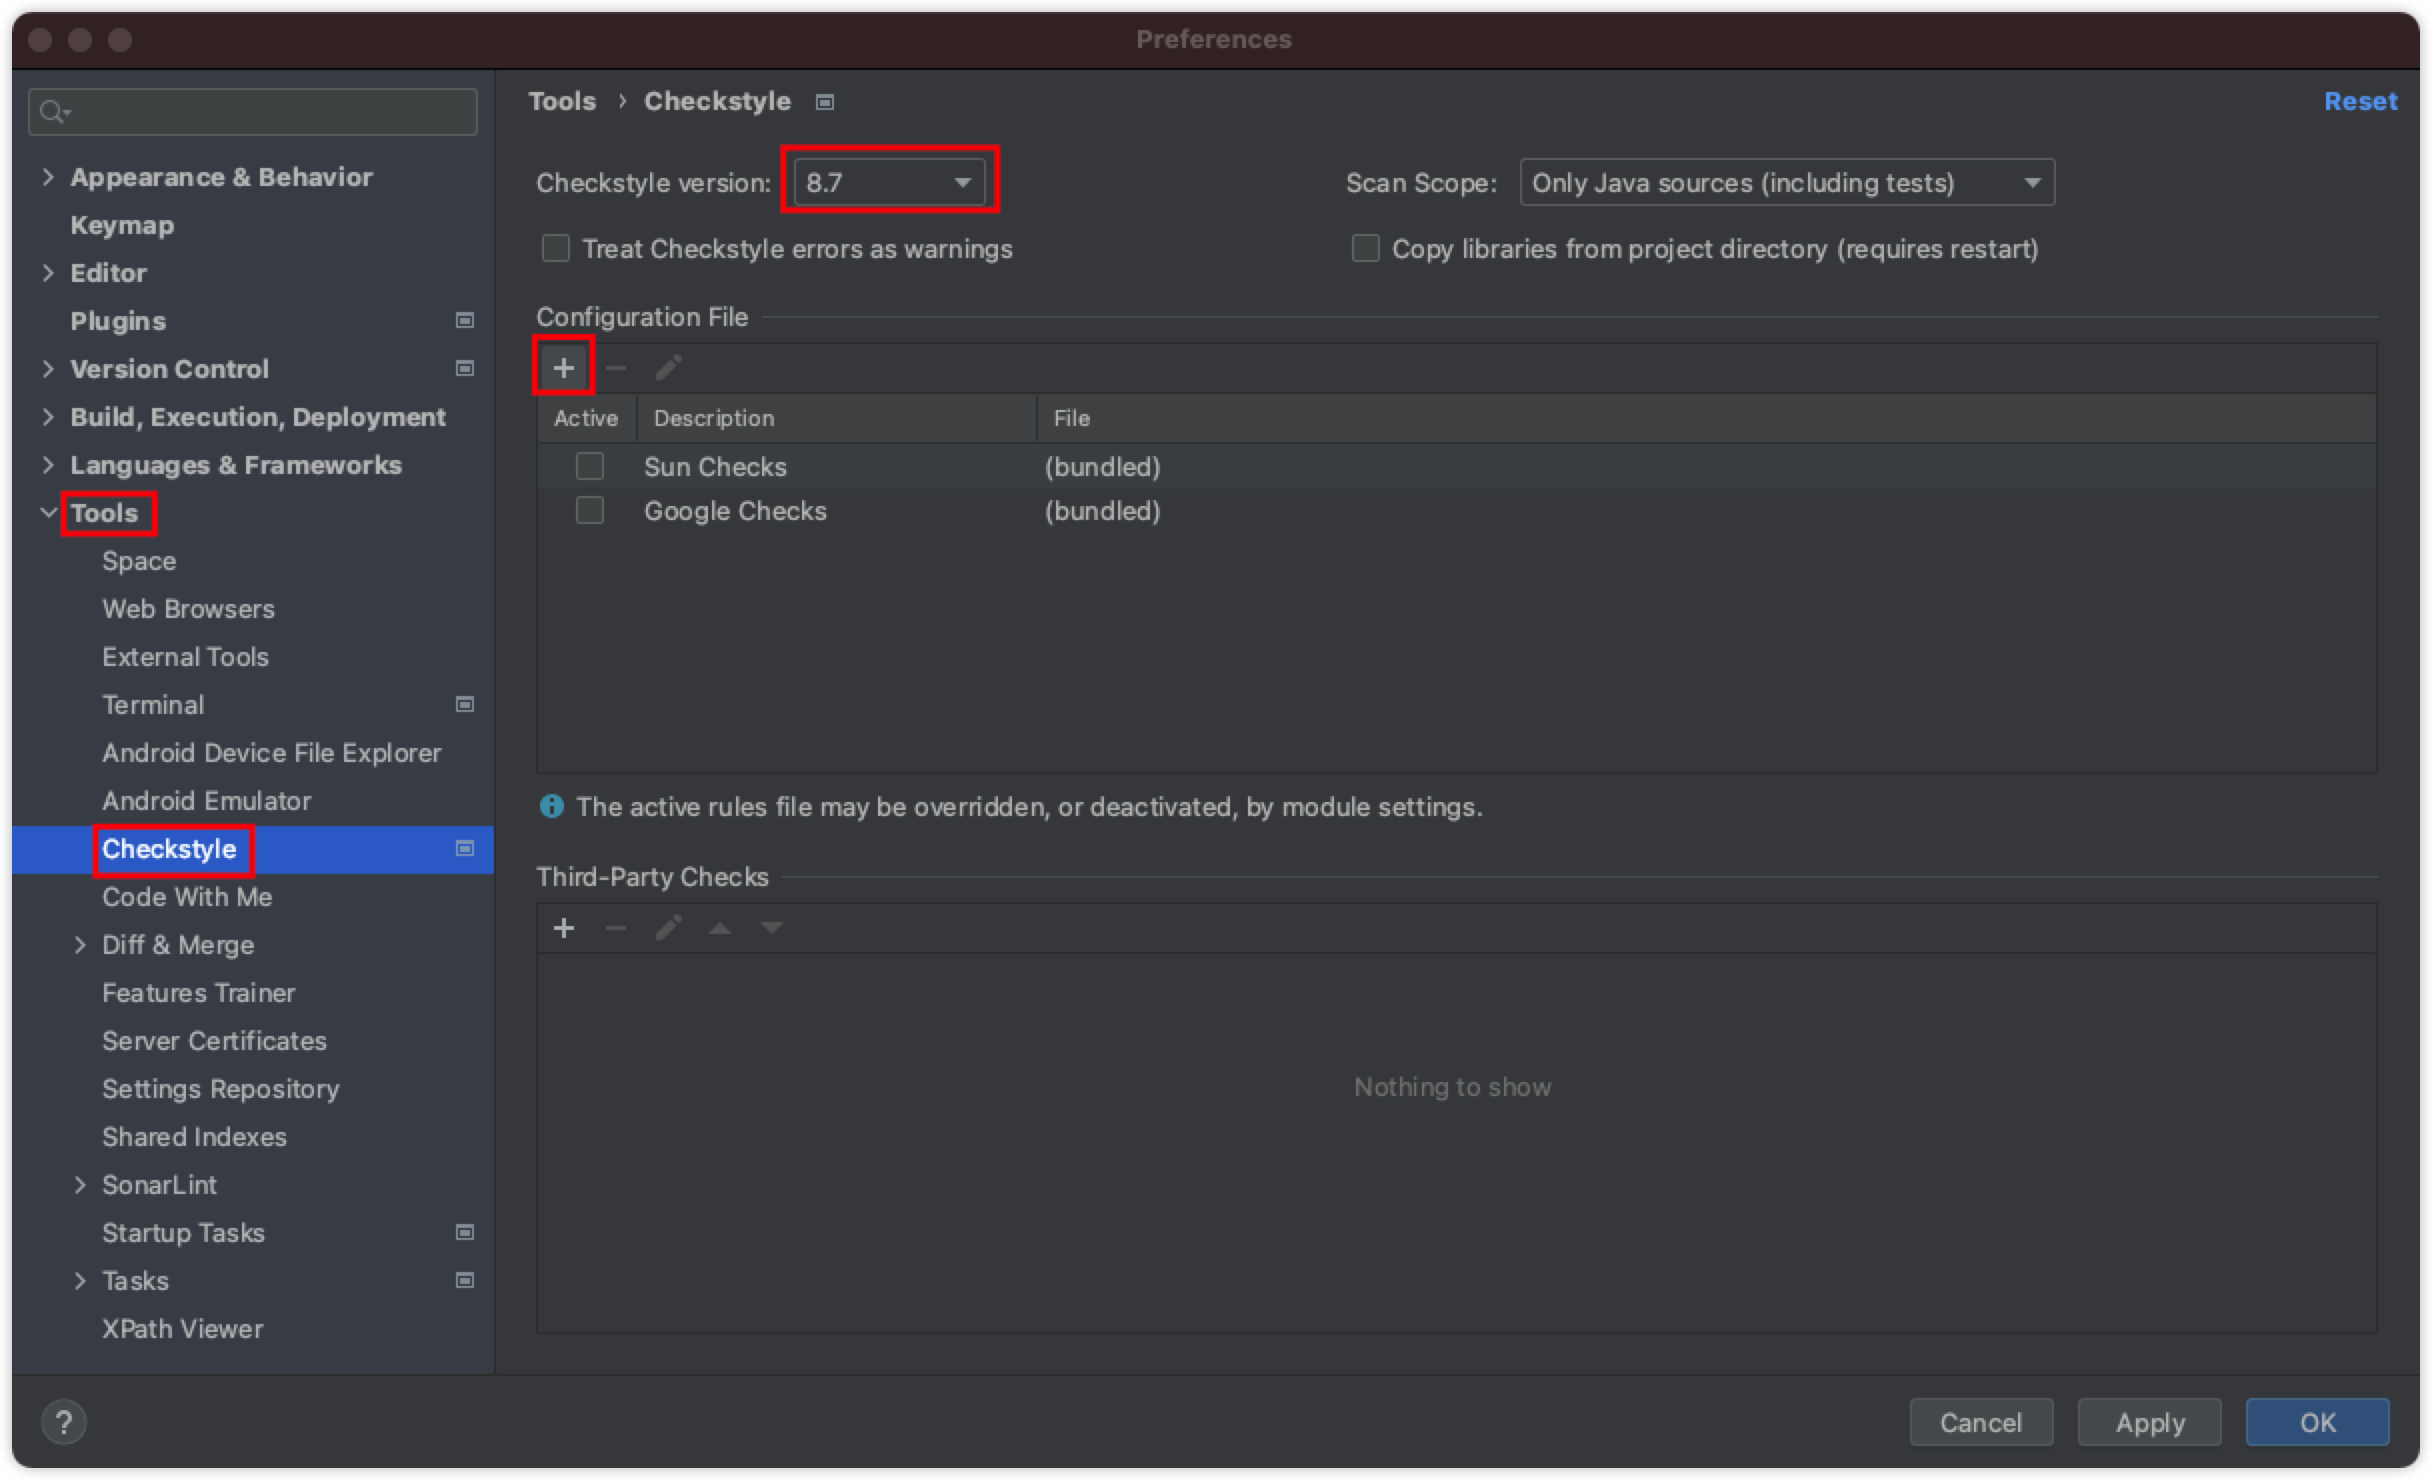
Code style configuration
First, download the java-orgon code style check configuration file, then in the Checkstyle configuration page, click "+ ", choose to use the "checkStyleAll.xml" just downloaded, after adding that, you can see this file in the "Configuration Files" list, and finally click "Apply" to complete the configuration.
After configuring the
Checkstyleplugin, you can useCheckstyleto check the code.Checkstylecan check a module or the whole project, and can also check a single file. Select "Check Current File" in the right-click menu of the file editor, and Checkstyle will check the file. If a code problem is detected, you need to modify it according to the prompts. Code can only be submitted when there are no code problems.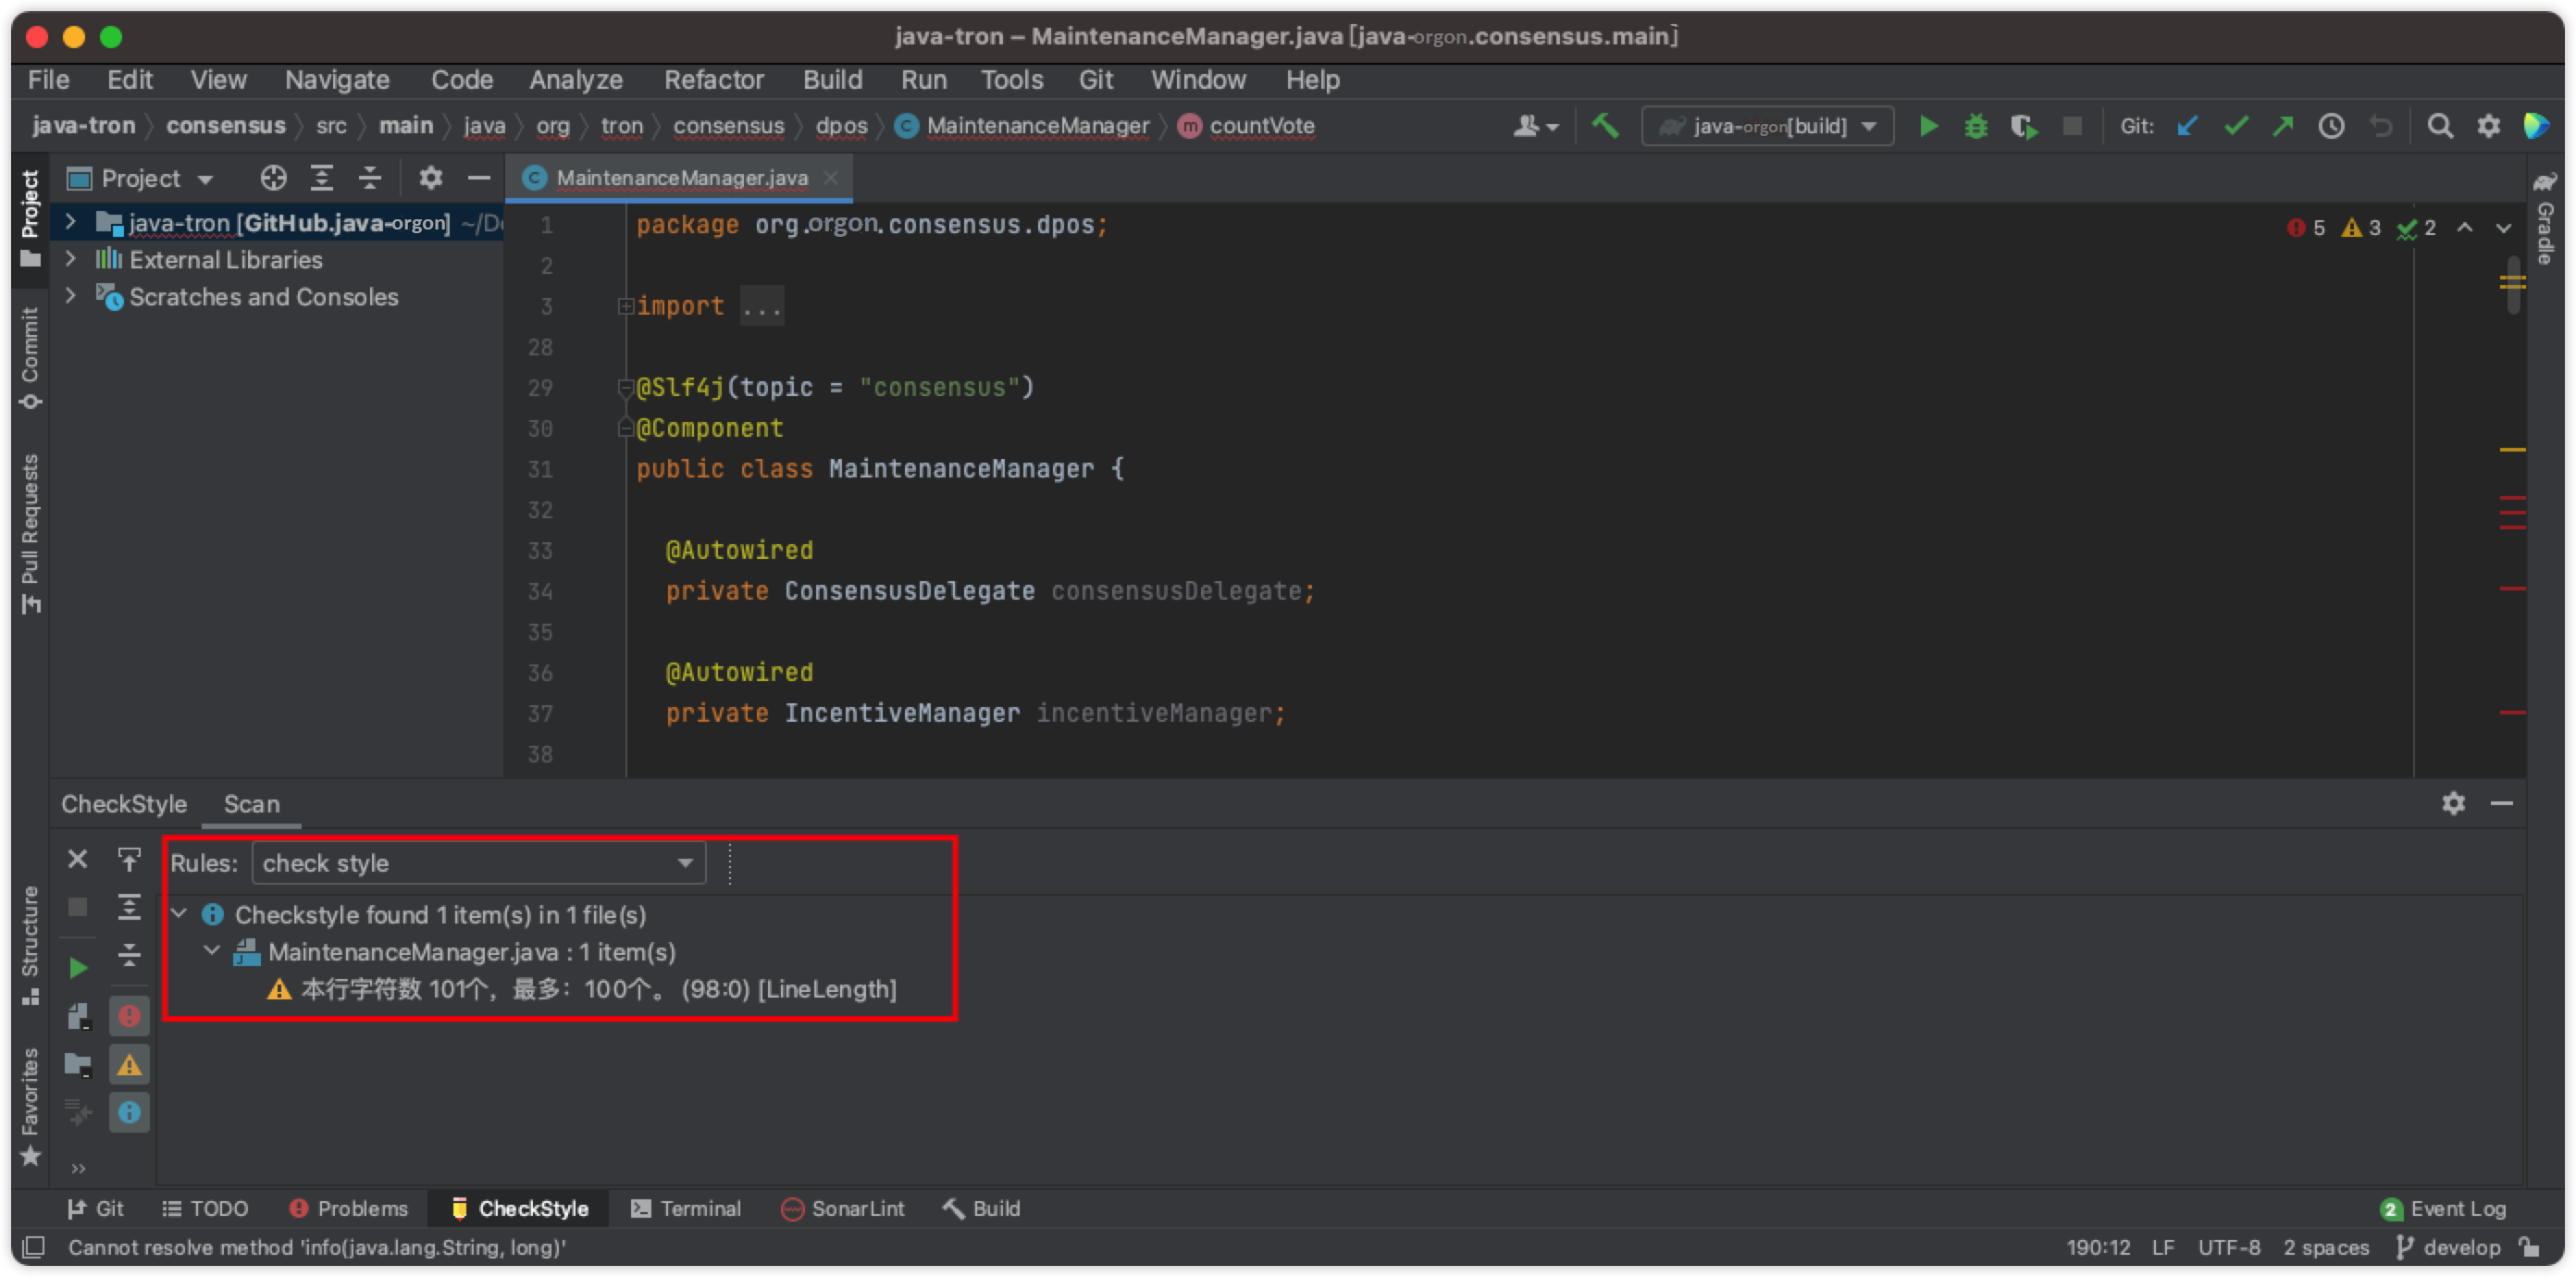
Compile java-orgon
You can use the terminal to compile java-orgon with the following command in the java-orgon project directory:
$ ./gradlew clean build
-x test to skip the execution of test cases:
$ ./gradlew clean build -x test
You can also compile java-orgon in IDEA: Open the java-orgon project in IDEA and click "Build" -> "Build Project" to compile the project.
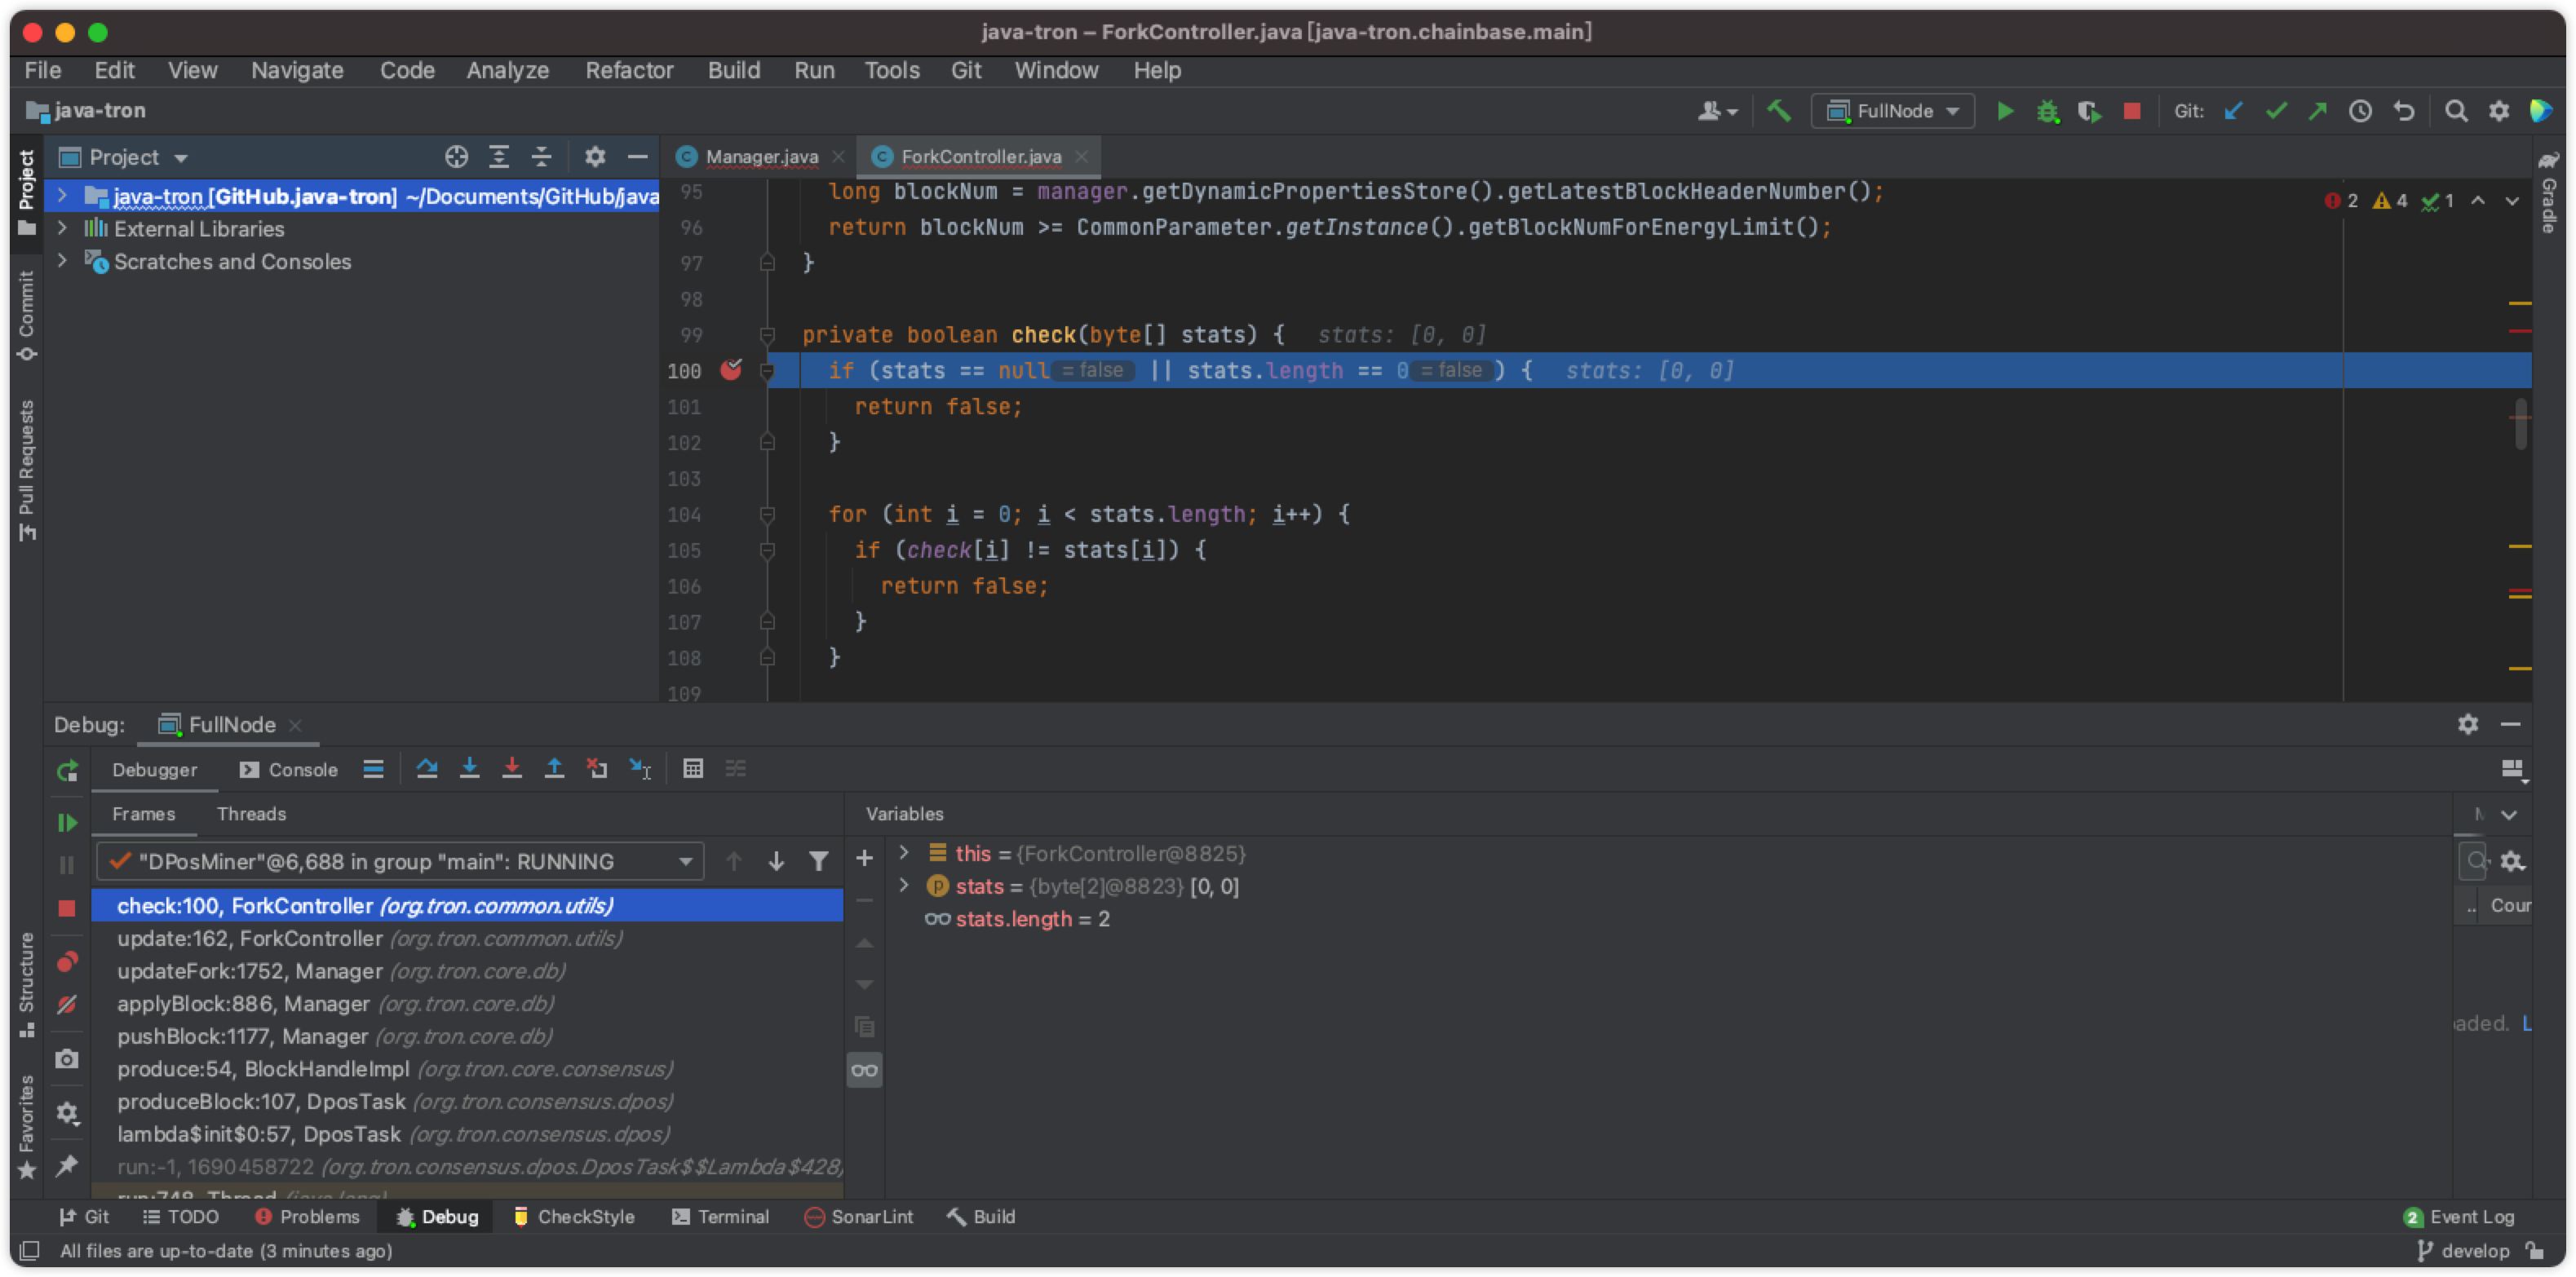
Run and Debug
Before running java-orgon, you need to create a working directory to store the database files and log files generated when the node is running.
$ mkdir /Users/javaorgondeploy
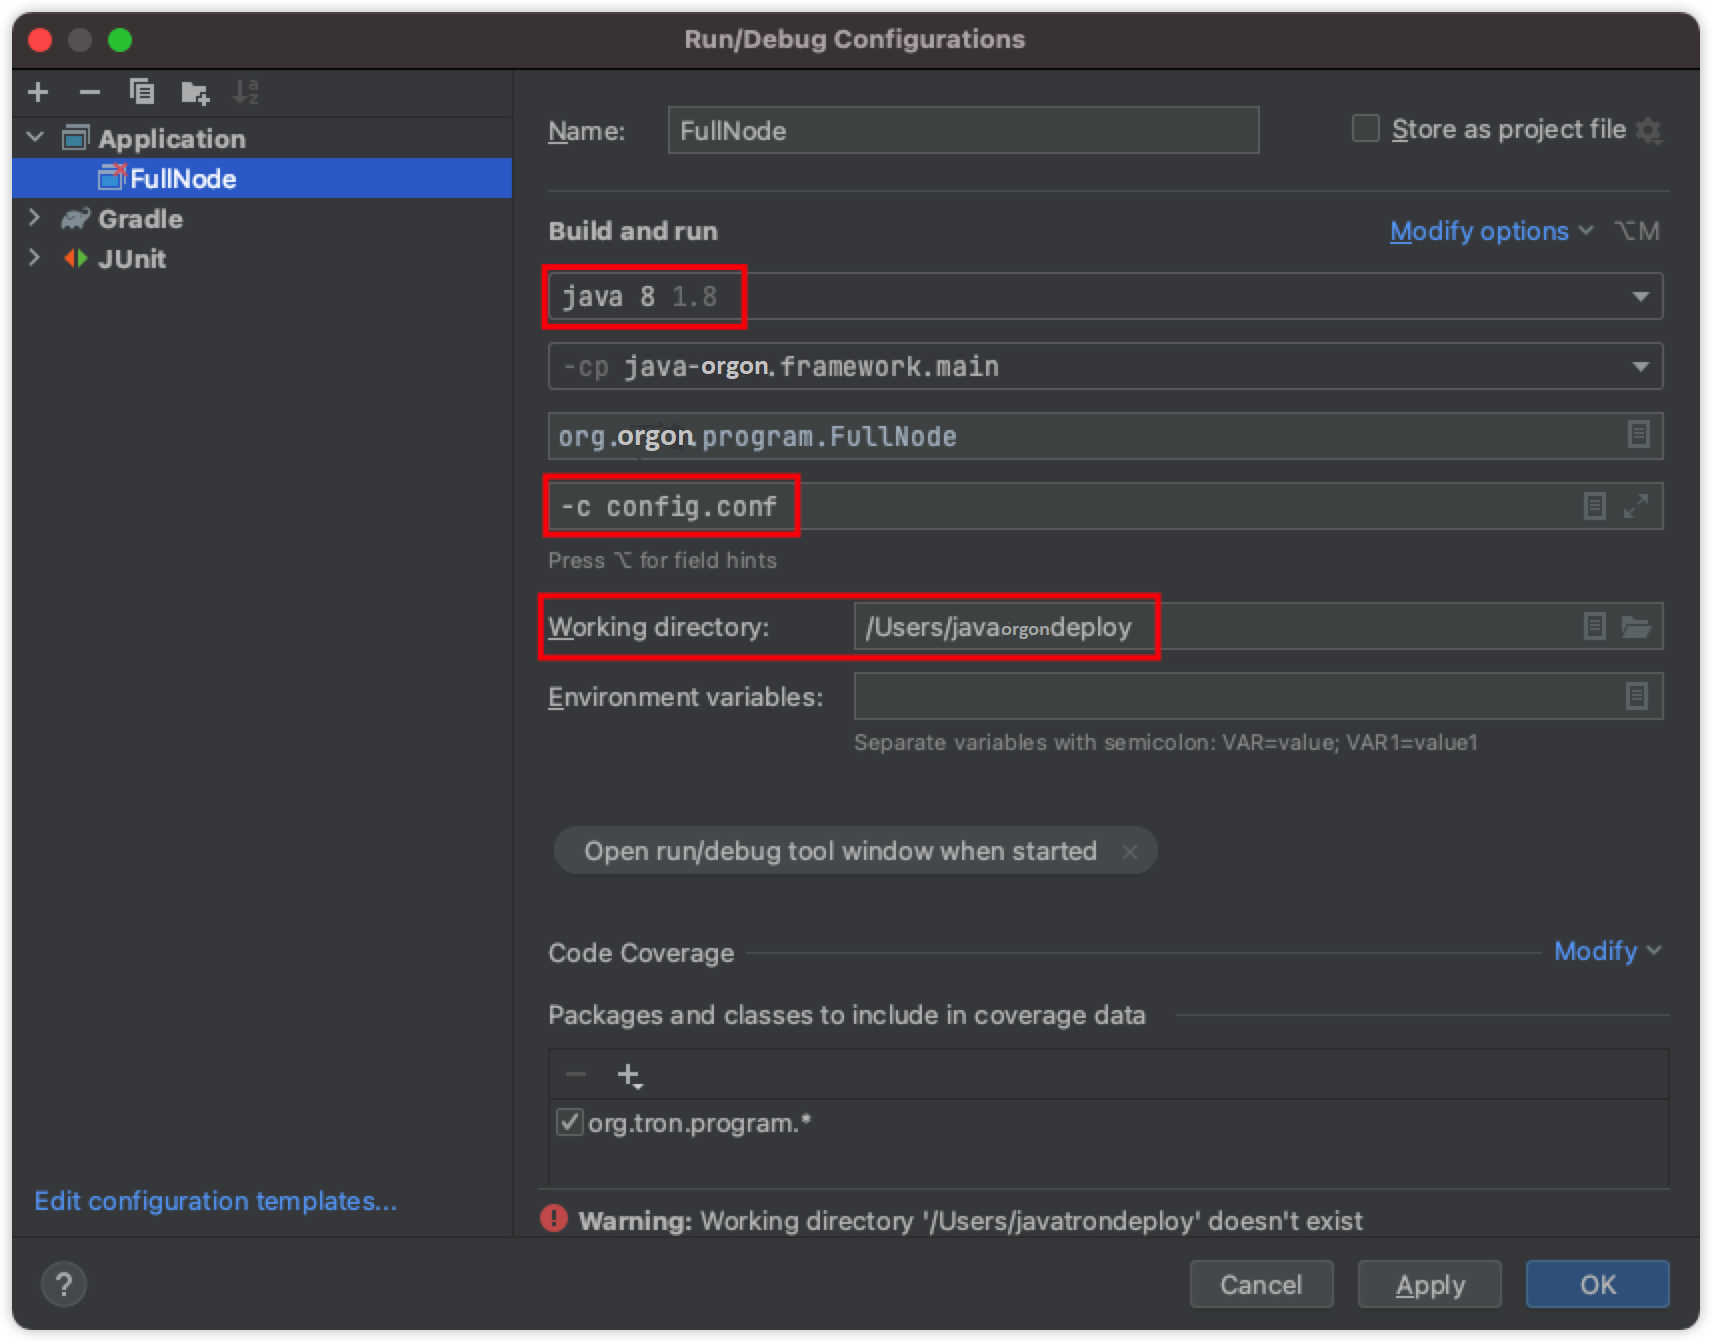
In the "Run/Debug Configurations" configuration panel, specify the JDK version running java-orgon as java 8, and then configure the command parameters for running java-orgon, for example, specify the node configuration file through the -c parameter as config.conf.
"Working directory" is configured as the working directory of java-orgon created earlier. When java-orgon starts, it will look for the config.conf configuration file in this directory. Please make sure that config.conf has already been in this directory.
After the setting, click the "Apply" button to complete the configuration. Then you can click "Run"->"Run FullNode" in IDEA to start the java-orgon node or click "Run"->"Debug FullNode" to start the node in debug mode. After the node is started, java-orgon logs are stored in the working directory.

If you want to debug the java-orgon code, you can set breakpoints in the java-orgon code and start it in debug mode, so that you can trace the debug code line by line.